

How To Make Eraser Bigger In Animate
That moment everyones been waiting for...??
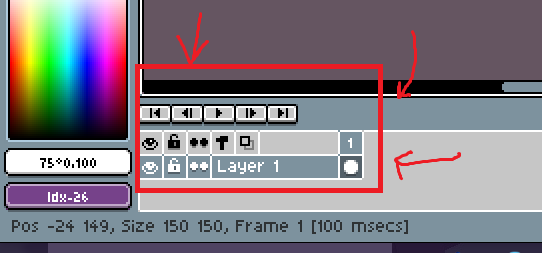
Now, at the lesser of the screen between the colour index and ...the bottom(?) you have the layers area. This works for just pixel fine art, but also with animation!
Let me say that with animation programs, I HATED Flash.
I could NEVER get used to key frames, no matter how they worked, merely
, and it makes a world of a departure!
(Plus I have patience to get to use information technology too.)
It's actually actually good for beginners !
Right click on the Layer 1 tab (or 'Groundwork', if you chose non-transparent.) to see all the options.

You have new, delete, duplicate. Pretty basic stuff.

By clicking Properties you will get a chance to rename your layer, or change the opacity, which allows you to brand it transparent (this is practiced for shadows behind/under characters, etc).
Y'all tin can do what you desire hither, but if you want to make a small-scale animation on your pic, open a new layer so not to mess up your stuff.
Let's Breathing!
On Layer ane (or whatsoever layer name you have), and draw a basic image equally your background.

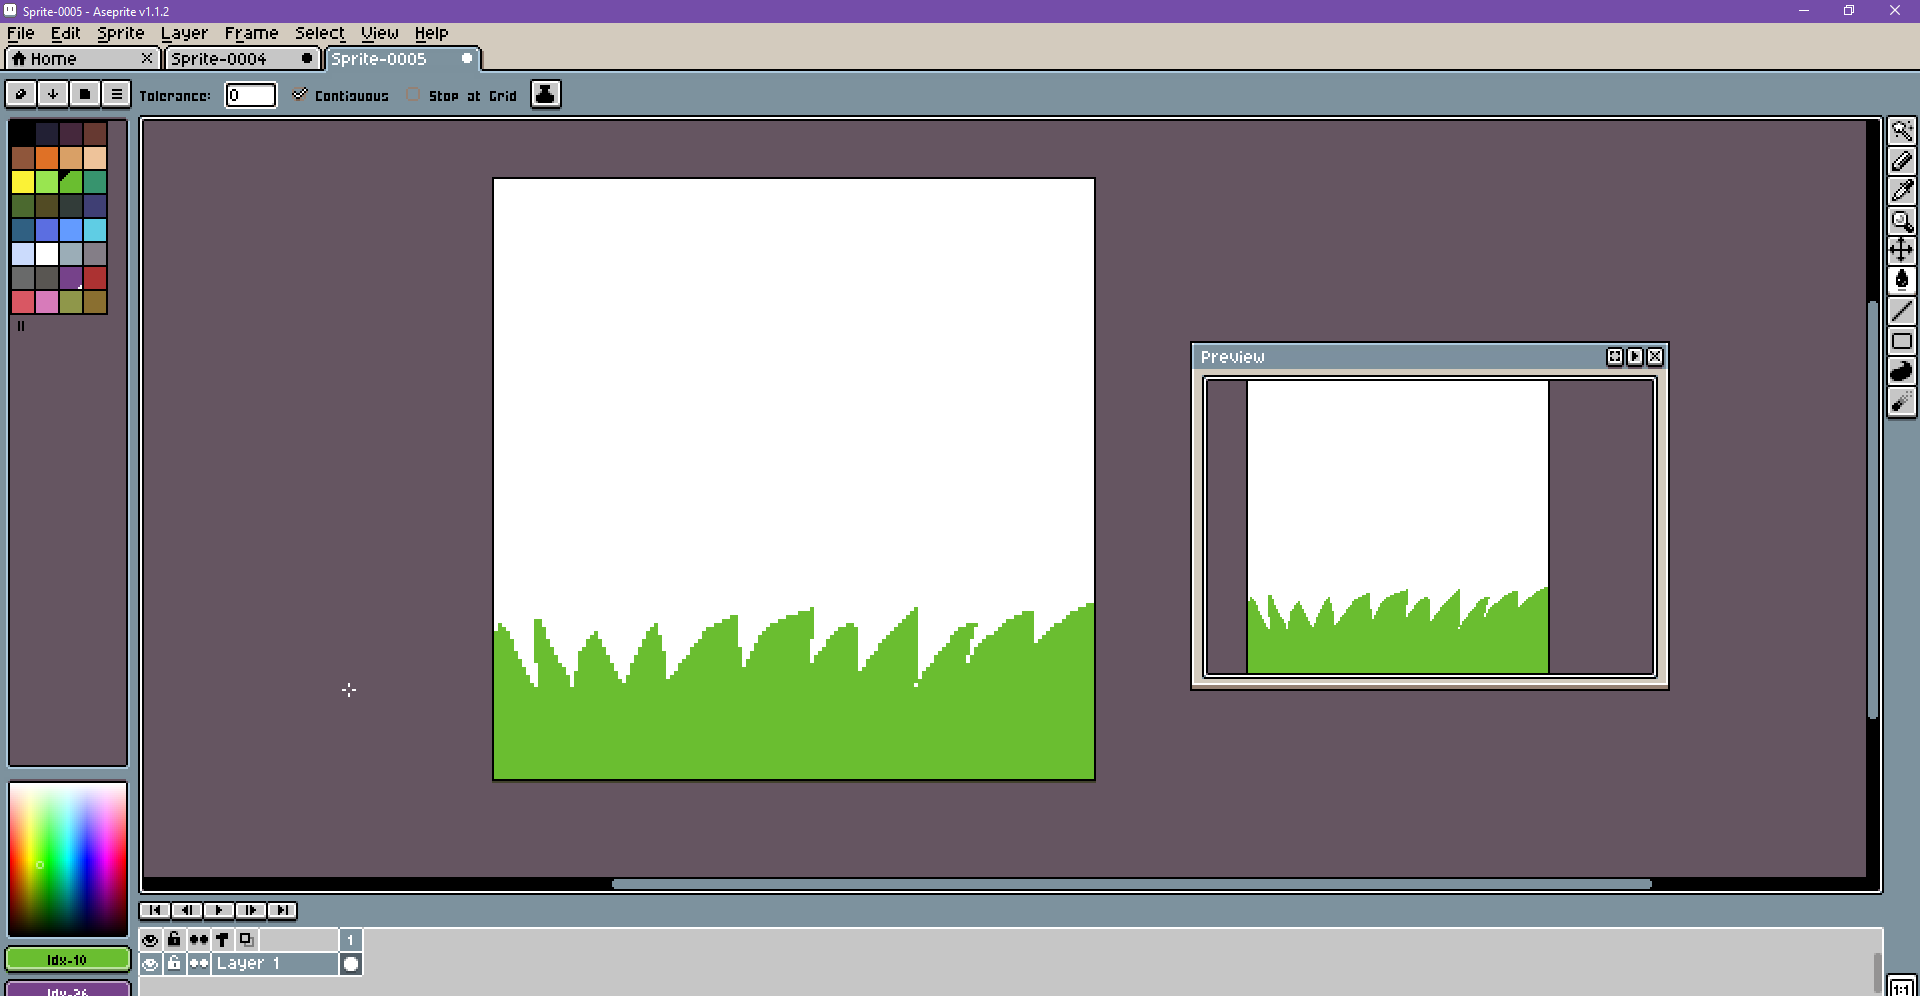
This is my grass. Don't diss it. Information technology's but grass. Cool grass.
At present lock that baby with this push adjacent to the layer. This way you don't mess it upwardly.
It volition make it so you deceit depict on it anymore, merely you can unlock it past clicking the push again.

**(Hint: If you click the lock button above it, or the eye, it'll lock all layers and hibernate all layers respectively)
This is now your background. Let'south describe a basic thing.
Add a new layer and name it if you like, then draw a homo or whatever in its Standing position.
For instance, look below.

This is who I will animate.
Aren't they fab?
Okay, at present go down to the O button thing next to your layers.

It should be FULL which means it has an image in it. (thats because you drew on it).
If yous right click the circle on the layers, and press duplicate cells it'll re-create the motion picture it to the side by side frame. This is what we want. Then practice information technology now.

Side by side, press F3.
That should open up something called onion skin.
It allows you to see whats on the other layer, so you can kinda get a reference to what you're doing in animation. It's cool!
Side by side, on the SECOND bubble (O) affair, erase your work you want to animate (I erased his trunk) and then describe the adjacent frame.

Contine the procedure but now on the tertiary bubble, along, etc.,
Make sure you lot keep your groundwork there updated likewise, or it'll vanish half way through!

To preview your animation, click play on this listing above the layer tab.

By clicking the 2nd push on the correct, you can change your onion skin settings, etc.,

It'due south all very handy! Just explore to make yourself a bit more comfortable!
To change the speed of your animation, get to FRAME and FRAME Backdrop.

Information technology'south at the top next to SELECT. It'll enquire yous what you want your animation speed to be, I commonly apply 150 or 200, simply that depends on what you're using it for.
Finally to salve your animation, go to FILE and Salve (or SAVE AS).

Click the drib downwardly bill of fare and
This will relieve information technology equally an animated graphic format, which tin can exist listed on many websites.
(if your background is transparent, it'll be transparent.)
Cheers for reading! Be certain to comment or anything if you'd like!
I'll add more in later. See ya!

Ha-cha-chacha ~ ~ ~
Source: https://steamcommunity.com/sharedfiles/filedetails/?id=630941660
Posted by: phillipsnotat1938.blogspot.com
0 Response to "How To Make Eraser Bigger In Animate"
Post a Comment