

How To Color Anime Skin With Colored Pencils
COLORING TUTORIAL! - Brave style! (≧▽≦)
Yahalo minna! I show you my style on coloring my drawing with colored pencil! ~('▽^人)
I'm not that adept on explaining things just I hope you lot still empathise my tutorial (ノ_<。)
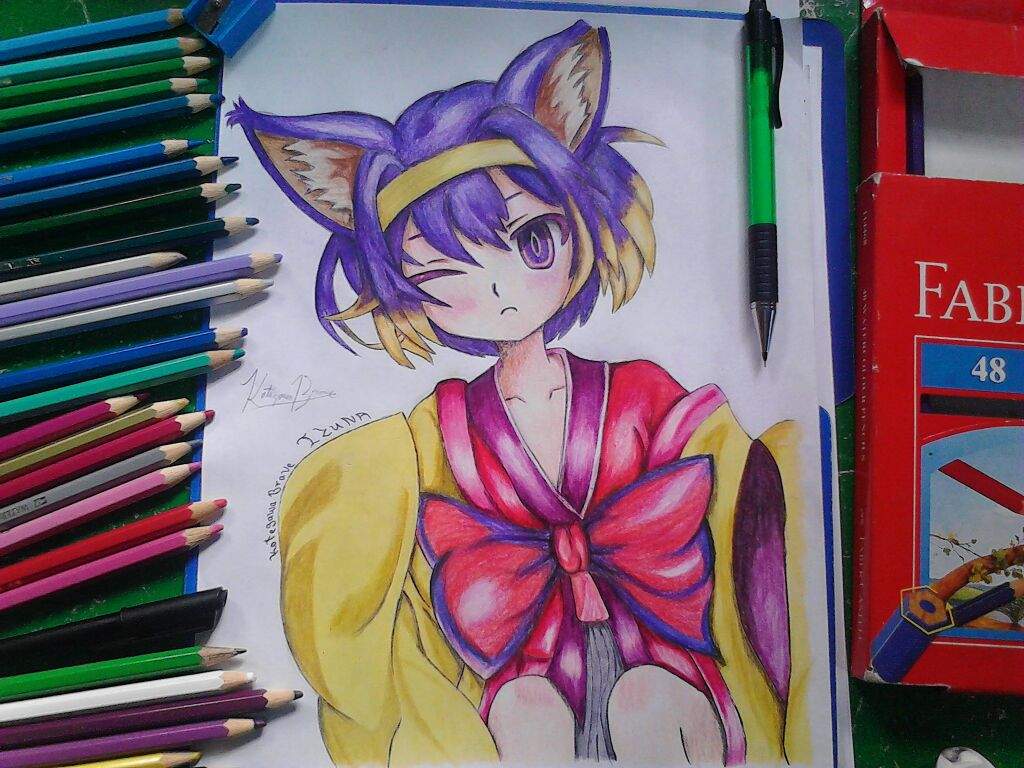
Here I use Izuna from the anime No Game No Life.
Lets start now! \(≧▽≦)/
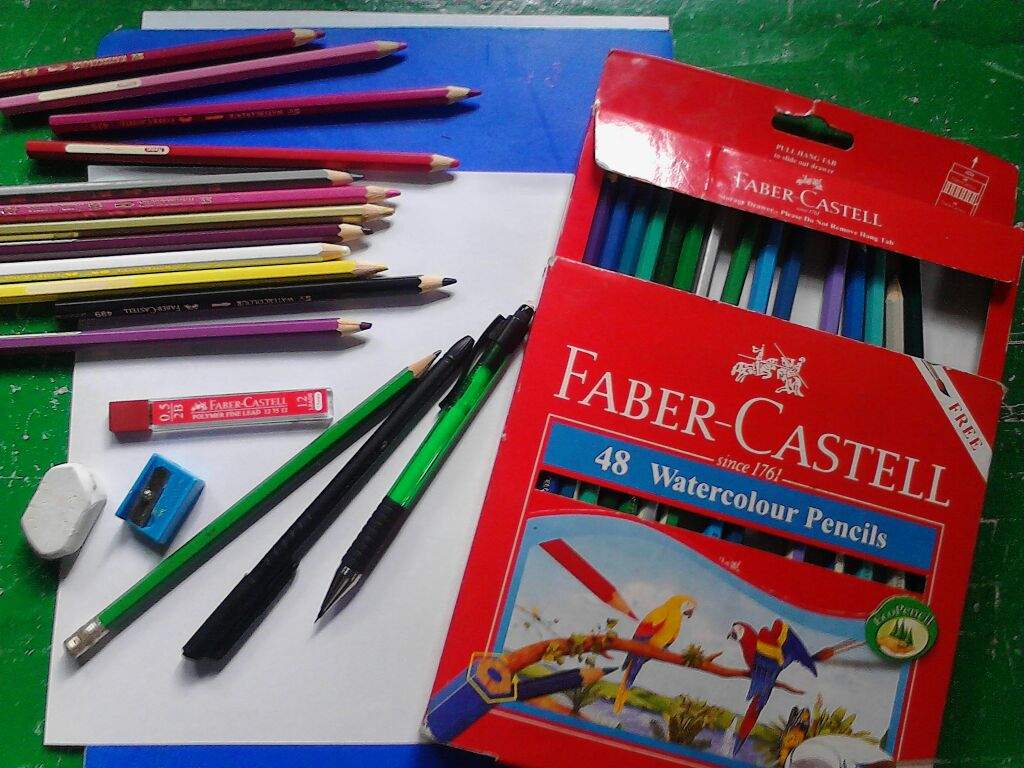
Things we need before nosotros first!
*Colored pencils
*Drawing pa or slice of paper
*Pencils
*Erasers
*Sharpeners
*Pen
I'm so sorry for depression quality pictures! (≧▽≦)
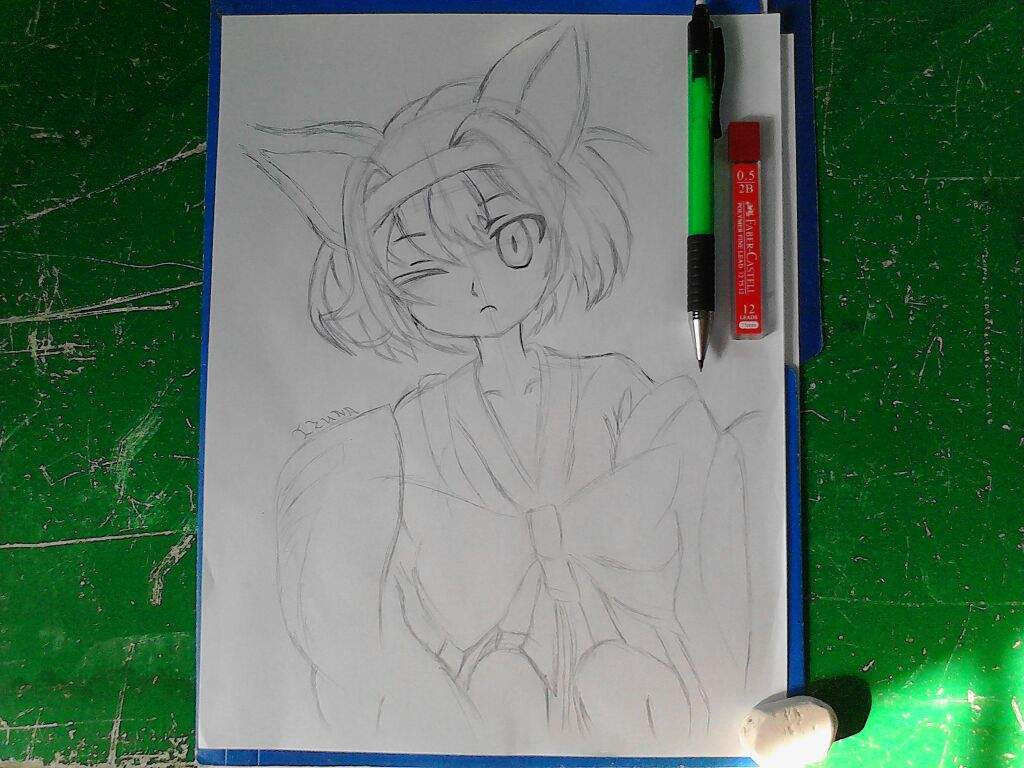
I started sketching using mechanical pencil but its just optional. You can use whatsoever kind of pencil!
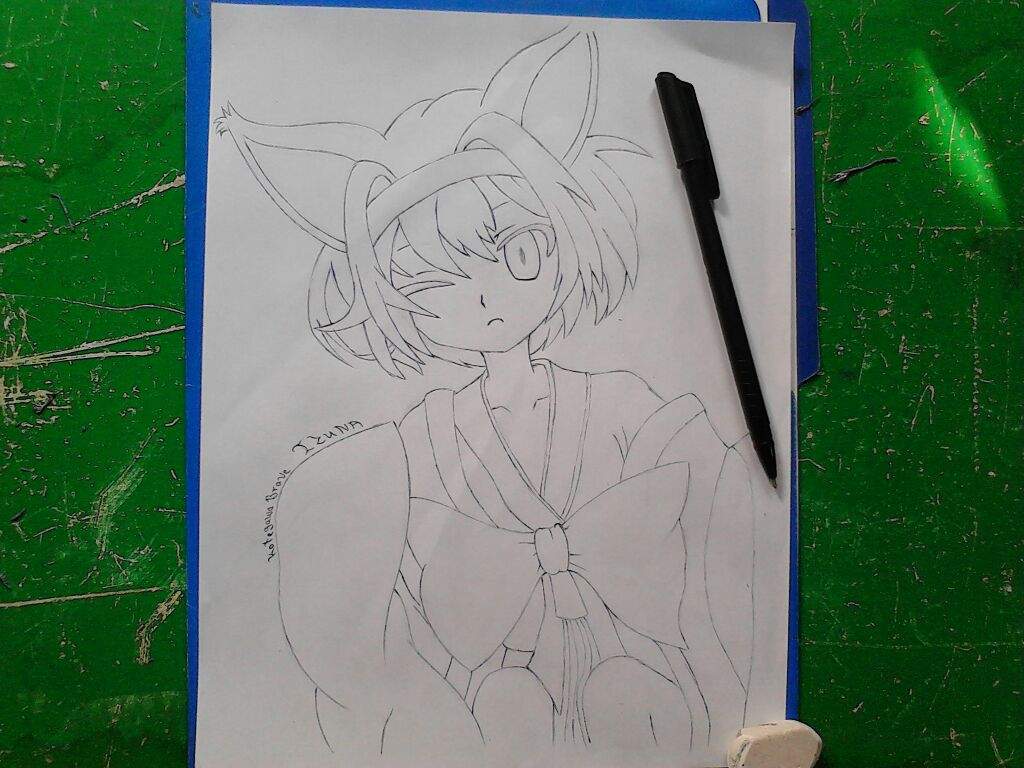
After sketching i use a regular pen for outlining. Then use eraser to remove unnecessary pencil lines!
We're now going to showtime coloring! \(≧▽≦)/
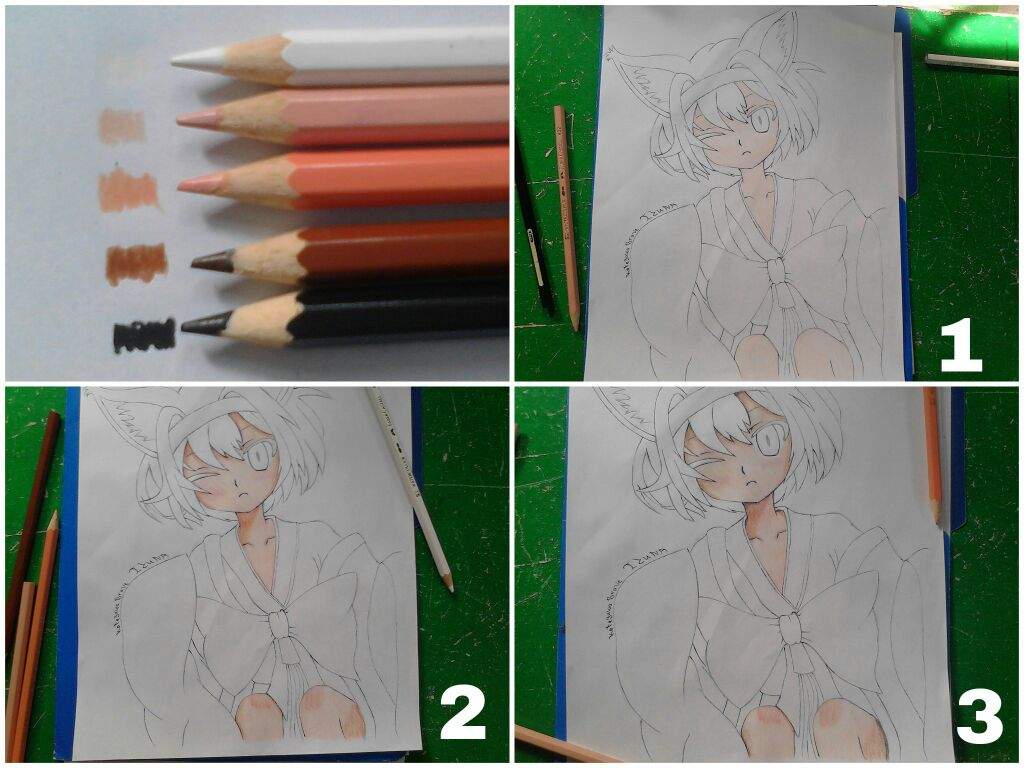
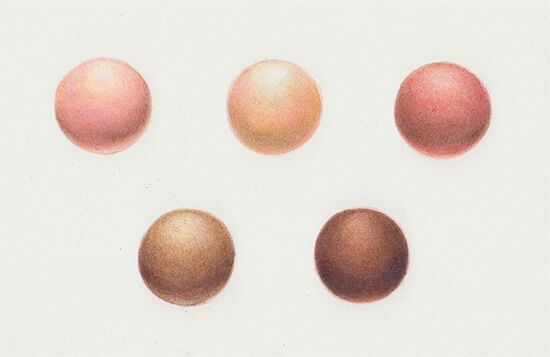
Peel!!! (≧▽≦)
Colors that i used: white, light flesh, night mankind, brown and blackness
Note: yous tin can use lite brown instead of low-cal and nighttime flesh.
Step 1-2: offset colour the skin with base color (lite mankind) then start building upward layers of colors, then Burnish information technology with white colored pencil.
Note: building up layers of colors or "Layering" is applying the color gradually and burnish information technology with white colored pencil doing information technology repeatedly will result to a good texture of the color and making information technology more than realistic.
Step 3: use the blackness colored pencil to darken or to shade an areas. Similar on shading using pencil to requite contrast light source is important.
Note: "Burnishing" is using white colored pencil or other colorless blending fabric to smooth the texture of the colour and gives information technology a silky look.
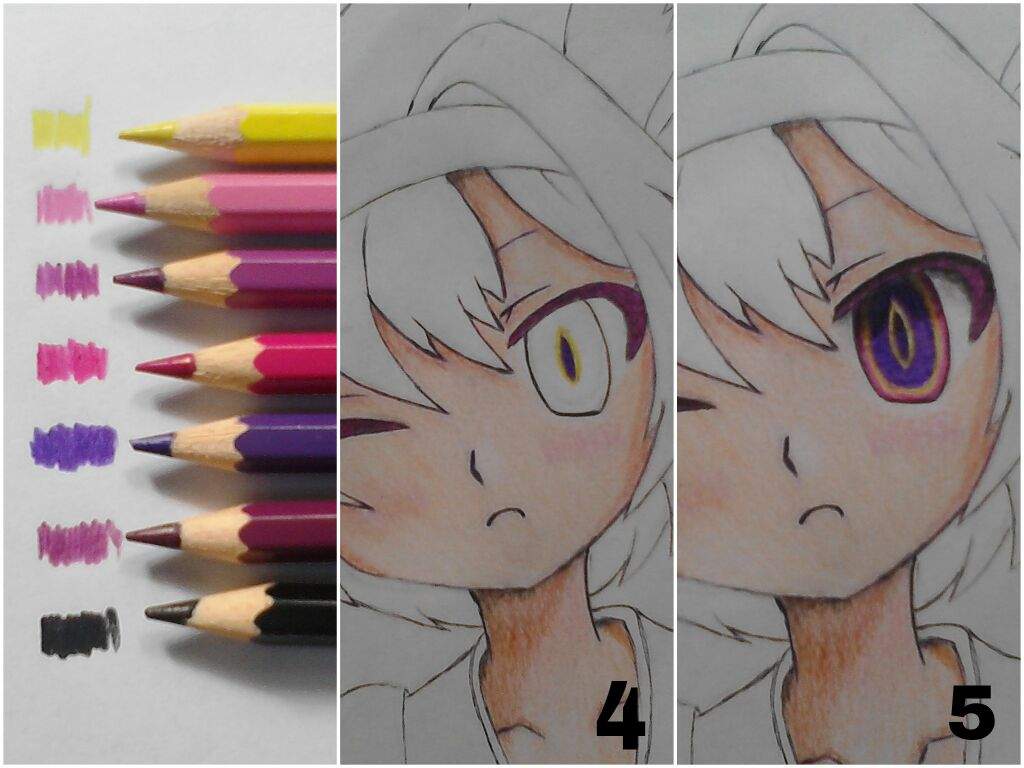
Optics!!! (≧▽≦)
Colors that i used: yellow, pink, light magenta, nighttime pink, violet, nighttime magenta and black
Notation: using and blending many colors volition give a huge impact.
Pace 4: describe first the pupil of the eye and color it with violet and yellow. Afterwards that i use night magenta on the upper eyelids instead of black just to make it more than colorful.
Footstep five: use colour pinkish, violet, xanthous and light magenta to colour the whole iris. Color the lower role of the eyelid with black colored pencil to make it more realistic.
Note: i used the dark colors (black, nighttime magenta and dark pinkish) on the upper office of the iris to make a dissimilarity to the lower part of the iris. Information technology volition brand the eye more realistic.
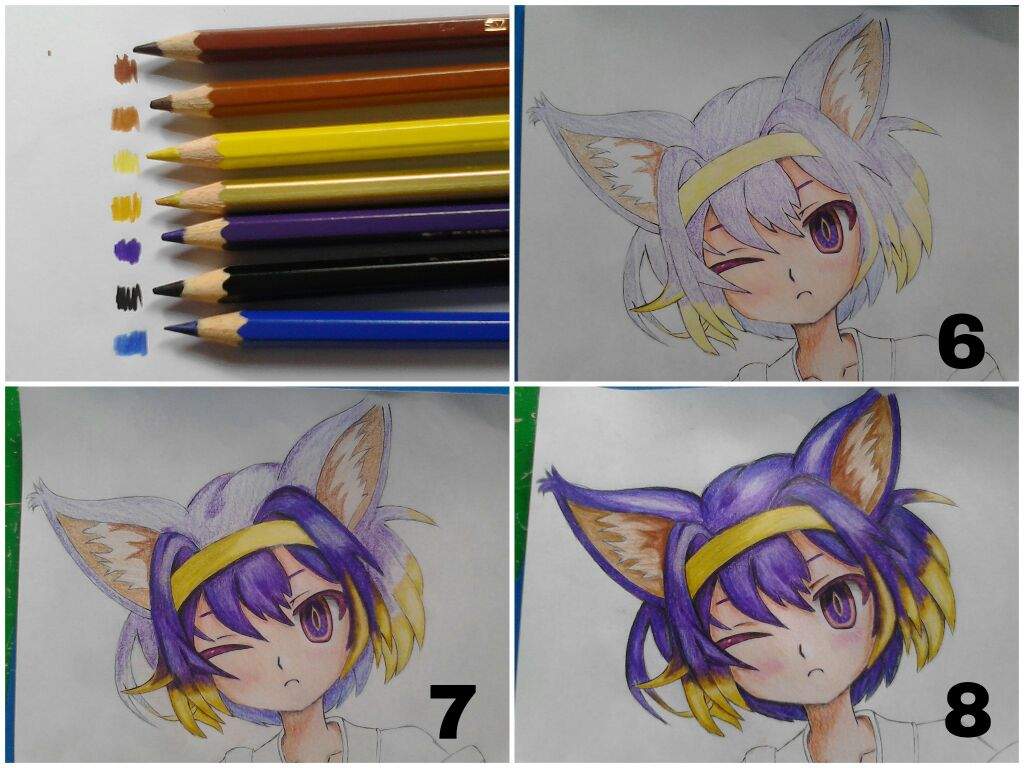
Hair AND EARS!!! (≧▽≦)
Colors that i used: dark-brown, light brownish, yellow, gold, violet, blackness, dark bluish and white
Step 6-7: colour the pilus with the base colors(violet, yellow and light dark-brown) and showtime creating layers of colors. Use white colored pencil to burnish it resulting to smooth and silky texture of the colors. color the hair role by part and don't hurry.
Step viii: apply the dark color(blackness and dark bluish) to make dissimilarity between hair strand it will make the hair more than realistic. After that burnish it with white colored pencil to smoothen the texture.
Notation: using light colors to darker one volition make the tone lighter and gives a shiny result.

RIBBON!!! (≧▽≦)
Colors that i used: white, dark blue, violet, dark pink, cerise, pink and black
Footstep 9: color the ribbon with base of operations colour(dark blue, violet, crimson and dark pink) then start edifice upwardly layers of colors.
Step ten: start applying the dark colors and burnish it white colored pencil to smoothen the colors.
Footstep 11: employ blackness colored pencil to make contrast and shading. It volition make you drawing more realistic
Notation: i use pink colored pencil on making lighter tones and burnish information technology with white colored pencil to requite a shine issue on the ribbon.
Apparel!!! (≧▽≦)
Colors that i used: white, gray, blackness, dark magenta, dark pink, pink, yellow, golden and red
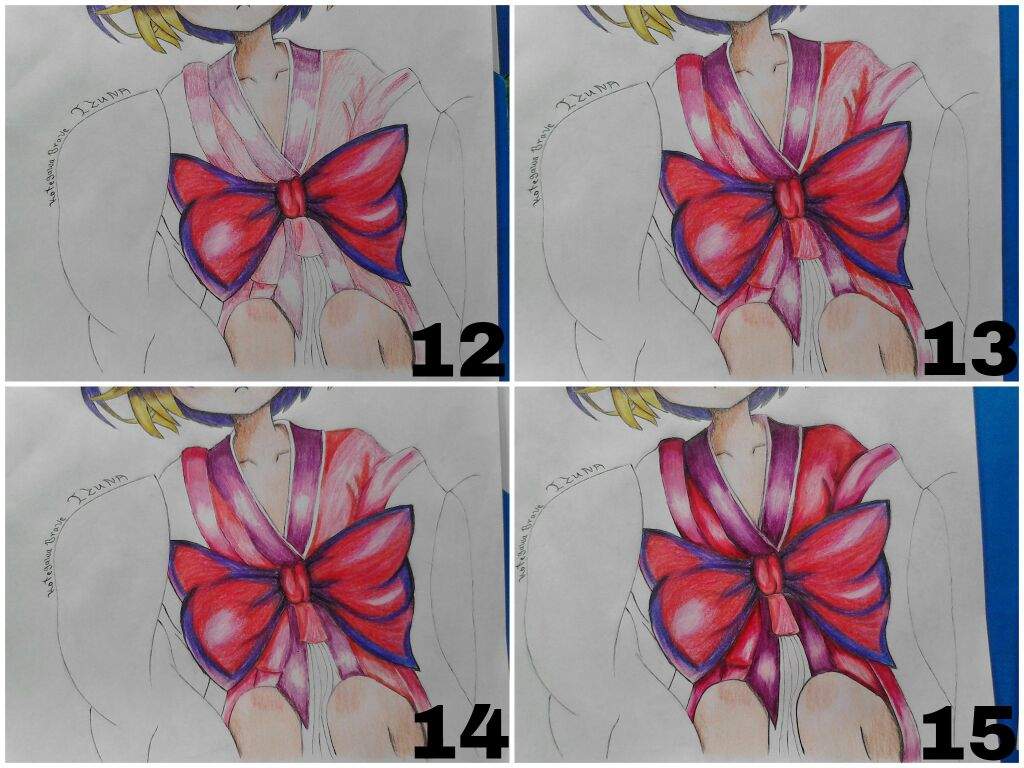
Step 12-thirteen: color the inner clothe with the base color(night magenta, cherry, pink, and dark pink) and starting time creating layers of colors then burnish it with white colored pencil.
Step fourteen-15: darken the color get in smooth. Employ blackness colored pencil on shading making contrast and burnish it again.
Note: making a contrast brand the color more realistic a little bit like on shading for example making a dissimilarity between 2 things to make a effect the they overlap each other while shading gives a darker tone on the object and shadow effect.

Step xvi-17: colour the outer clothe with base color (gold, yellow and dark magenta) and build up layers of colors. Then burnish information technology with white colored pencil to smoothen the texture.
Pace xviii-19: darken the colors then burnish information technology. Use the black colored pencil on making contrast and shading. It will reveals the folds on the clothe making it more than realistic.
Note: i apply many color to make it more circuitous and more than colorful.
And at present we finished coloring the drawing!!! \(≧▽≦)/
HERE'S SOME TIPS AND THINGS TO REMEMBER WHEN COLORING WITH COLORED PENCILS!
TIP#one: Using lighter color on the dark one and burnishing will gives you lighter tone and a shine effect.
TIP#2: Applying different pressure on the same color will give you unlike result for example applying hard pressure on the colored pencil will requite y'all rich colour.
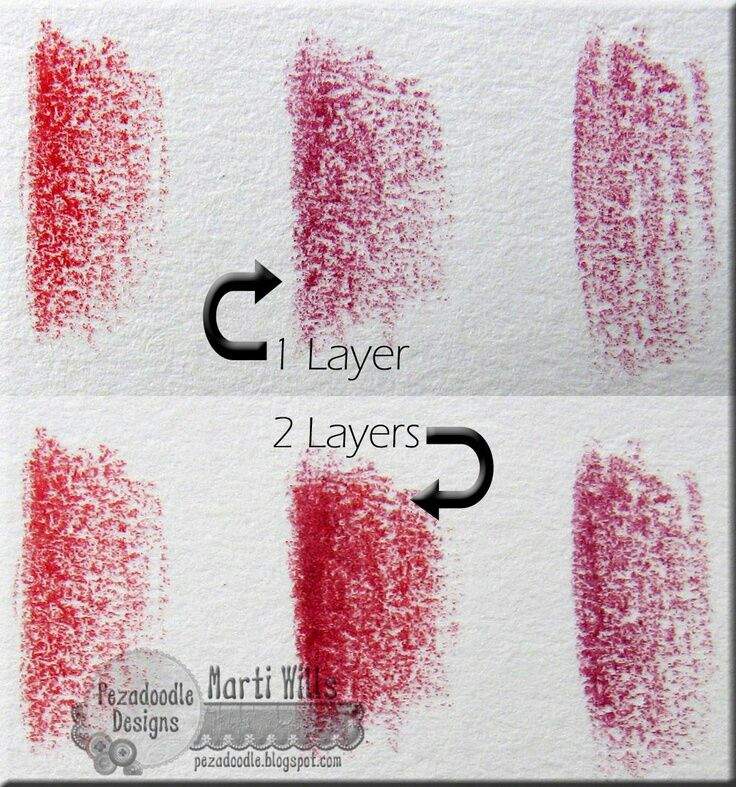
TIP#iii: "Layering" is applying the colored pencil gradually to brand layers on color. exercise not rely on unmarried awarding of colour layering will bring skilful texture making your colors more complex and more realistic.

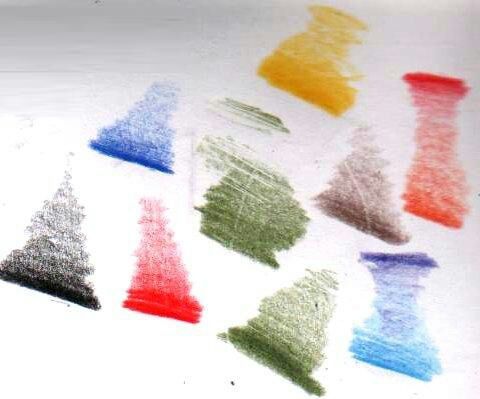
TIP#4: "Blending" always blend colors information technology gives a good effect on the colors. For instance when coloring a grass don't use greenish only try blending it with blue and xanthous to gives you different tones.
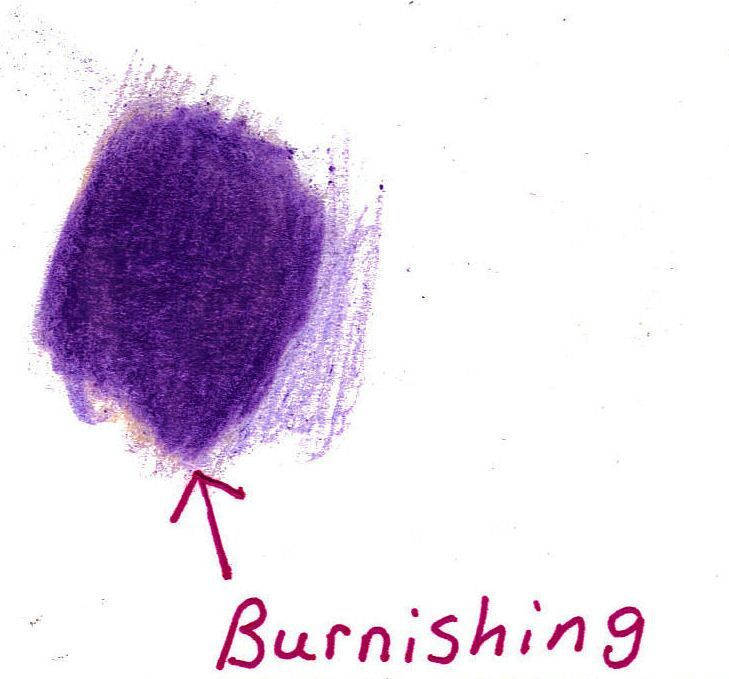
TIP#5: "Burnishing" is using white colored pencil or other colorless blending textile to make your colors smooth, silky and realistic.
TIP#six: take your fourth dimension when coloring with colored pencil. because colored pencil demands time when using it.
TIP#seven: Failure is the key to success.
TIP#eight: Practice and dear on what y'all doing can make everything possible.
Thank you for reading and viewing!!! \(≧▽≦)/
I hope y'all learn something new i tried my best explaining it even i'g bad at information technology.
HONTOU NI ARIGATOU MINNA!!!
special thank you to my bestfriend LUCINA she helps me a lot doing this tutorial.
feel free to exit a annotate on what should i improve. I can besides practise a request and other tutorials
Source: https://aminoapps.com/c/anime/page/blog/tutorial-1-coloring-tutorial-colored-pencils/vqtn_u6pg83GMe5waLkogkkLM8MDKg
Posted by: phillipsnotat1938.blogspot.com
0 Response to "How To Color Anime Skin With Colored Pencils"
Post a Comment